Is your showerhead rusty, leaky or just not doing the job? Changing a shower head is an easy DIY project that anyone can tackle. This guide will show you step-by-step how to replace your old one with something better.
Grab your tools – it’s time for a quick bathroom upgrade!
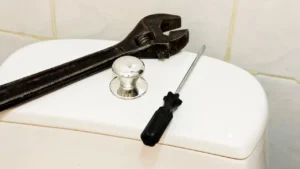
Tools and Materials Needed
Are you ready to replace your old shower head? Before jumping in, gather what you need. This makes the process smooth and saves time.
– Soft-jaw pliers or a soft cloth: These protect the shower arm from scratches while loosening parts.
– Wire brush, old toothbrush, or damp paper towel: Use these to clean dirt or rust from the threads on the pipe.
– Stepstool or ladder: A step-up tool helps you reach higher shower fixtures easily and safely.
– Adjustable wrench with channel locks: Use this to grip and turn stubborn screws without slipping.
– Replacement shower head: Choose from fixed, hand-held, or combination styles based on your preference. Prices range from $30 to $300 at shops like Bunnings.
– Thread-sealing tape (plumber’s tape): Wrap this around the threads of the pipe for a tighter seal and to prevent water leaks.
Steps to Remove the Old Showerhead
Getting rid of your old showerhead isn’t hard. With a few tools and simple actions, you’ll have it off in no time.
Turn off the faucet
First things first, shut off the faucet completely. This stops water from spraying everywhere during your shower head replacement. Forgetting this simple step can leave you soaked or with an unexpected mess to clean up.
Twist the tap tightly, no need for brute force—just ensure it’s snug.
If your home has separate valves for hot water and cold water, close both. Some plumbing systems might even benefit from turning off the main water supply as an extra precaution. Save yourself a headache by double-checking there’s no drip left before moving forward!
Unscrew the existing showerhead
Grab the shower arm firmly. Turn the old shower head counterclockwise by hand to loosen it. If it’s stuck, wrap a cloth around the connection to protect the pipe. Use pliers or a wrench over the cloth for extra grip.
Work slowly and carefully—no need to force it too hard. A sudden twist could damage the threads or pipes. Older showerheads might be harder to remove due to rust or age, but patience is key here!
Clean the shower arm threads
Once the old shower head is off, focus on the exposed threads of the shower arm. Use a damp paper towel, an old toothbrush, or a wire brush to scrub away dirt, rust, or leftover tape.
This step helps avoid leaks later.
Dry the cleaned threads using a paper towel. Any moisture left can cause problems with sealing tape sticking properly. Make sure no debris remains before moving on to install the new fitting!
Installing the New Showerhead
Switching to a new showerhead is quick—wrap, twist, test; you’re good to go! Read on for the full scoop.
Apply thread-sealing tape
Wrap the thread-sealing tape around the shower arm threads clockwise. Cover each layer halfway to create a snug fit. Smooth it into the grooves with your fingers to seal gaps. This stops water from leaking later on.
Use good-quality tape from places like Bunnings if you’re unsure what’s best. Too much tape can make screwing on the new showerhead tricky, so avoid overdoing it. Two or three wraps are usually enough for tight threads!
Attach and tighten the new showerhead
For fixed shower heads, twist the new head onto the shower arm by hand. Turn it clockwise, but don’t overtighten. Use a wrench gently if needed. For handheld models, secure the mount, connect the flexible hose to it, and attach the head firmly.
Combination heads need more steps—connect the diverter valve first, then both main and handheld heads as per instructions.
Check that everything feels snug but not forced. A loose connection may leak later! “Do what you can with what you have,” they say—and here your tools are your best mates for now!
Check for leaks and make adjustments
Turn on the water gently to check for leaks. Watch the connections closely, especially around the threads and washer. A small drip might mean loose fittings or gaps in the thread-sealing tape.
Tighten the showerhead with a wrench if you see any drips. Still leaking? Remove it, add fresh thread tape, then reattach firmly. Test again until it’s leak-free.
Conclusion
Swapping a showerhead is quick and easy, even for beginners. With the right tools and steps, you can finish in under 20 minutes. A new showerhead can save water and make your showers more enjoyable.
Plus, it’s a handy skill to add to your DIY inventory! Give it a go—you’ve got this.