We’ve all been there – you finish washing the dishes and notice a small puddle on the floor. At first, you shrug it off and wipe it up without much thought. But then it keeps happening every time you use the sink. Uh oh, it dawns on you that your kitchen sink is leaking underneath. Your heart sinks a bit, realising you’re looking at a hassle to fix.
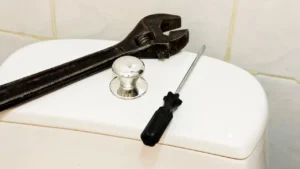
But don’t sweat it too much. With some playing detective and a little elbow grease, you can probably tackle that leaky sink yourself.
Identifying the Source
The first step is snooping around under there to figure out exactly where the water is coming from. Is it a dripping pipe? The drain? Or the faucet itself? Here’s what usually works:
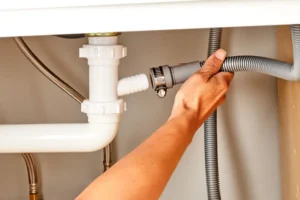
Clear everything out of that cabinet under the sink so you’ve got room to operate. Put some towels or paper down to catch any drips and trace them back to the source. Turn on both taps and keep an eagle eye out as you run the water. See if you can spot where those sneaky drips are coming from as you check all the pipes and connections.
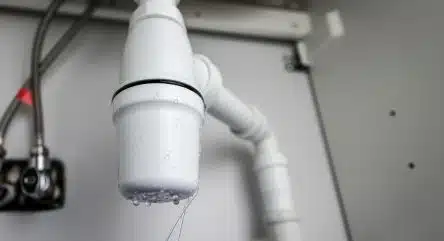
Check for moisture around the strainer body, tailpiece, and slip nut that connects the tailpiece. Water here signals that the source is the drain.
Examine the faucet sprayer hose for drips, which means the issue is with the faucet.
Don’t you see any obvious drips? It may be an issue where the sink meets the countertop. Puddles here signify water is running down along the sink basin.
Once you’ve identified the problematic area, it’s time to diagnose the issue further and take action.
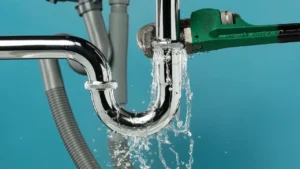
Fixing a leaky drain
If your detective work points to the kitchen drain or its connections being the culprit, there are several possible causes. Cracks or rust in the tailpiece, a faulty slip nut seal, misaligned pipes, or a damaged strainer basket can all lead to water ending up on your floor instead of down the drain. Start by thoroughly cleaning out the drain trap and strainer basket to remove any built-up gunk around the connections. Then check the following areas:
- Tailpiece/slip nut seal: loosen and re-tighten the slip nut or replace the seal if worn out.
- Positioning of the tailpiece, P-trap, and sink drain: realign if needed.
- Cracks or rust spots on the tailpiece should be replaced if a compromise is found.
Getting a new slip nut seal, P-trap, or tailpiece is an inexpensive fix readily available at any hardware store. Watch some online tutorials to learn how to correctly detach and reattach drain connections. Be sure to have a bucket handy to catch any water still left in the pipes. If the leak persists even after addressing these issues, it is possible that cracks have developed in the sink drain itself, in which case the entire assembly may need replacing.
Stopping faucet leaks
Leaky faucets usually come down to problems with washers and O-rings inside the faucet body. Typical trouble spots:
- Dripping spout: worn-out O-rings around the faucet stem need replacing.
- Leaking handle: faulty washers under the handle caps are not seating properly.
- Sprayer hose leaks; cracked sprayer hose needs replacing
Fixing faucet leaks is often fairly straightforward. Start by shutting off the water supply valves under the sink. Then disassemble the various faucet components to examine washers and O-rings. Replace any that appear cracked, flattened, or otherwise deteriorated. Match new washers and O-rings with the identification numbers etched on the existing ones. When reinstalling faucet components, check the manufacturer’s instructions and don’t overtighten connections.
If the new O-rings don’t solve the problem, you may need to replace rubber valve seats inside the faucet body itself. This requires special tools and knowledge to do correctly. At this point, it’s smartest to call in a professional plumber rather than risk damaging the faucet further.
Sealing off Sink Basin Leaks
Dealing with a leak between the sink itself and the surrounding countertop requires removing the sink basin to apply fresh caulk. With the sink emptied out, clean away all the old caulk, taking care not to further widen any existing gaps. Then apply a silicone or latex caulk designed specifically for kitchen and bath areas along the rim where the sink meets the counter.
Follow the caulk manufacturer’s instructions closely. Cut the applicator tip to the recommended size opening for the right-thickness bead. Angle the caulk gun at about 45 degrees and apply steady pressure as you circle the sink rim perimeter. After you’ve fully caulked around the sink, use a wet finger, damp sponge, or special caulking tool to smooth and shape the caulk into a neat finish.
Let the caulk cure fully—usually about 24 hours—before using the sink again. The new caulk creates a watertight seal that will hopefully solve those persistent leaks! Be diligent about regularly checking your sink rim caulk for any cracks or gaps developing, and recaulk as needed to prevent leaks.
A leaking kitchen sink can certainly create headaches, but arm yourself with the right information and materials and you can often remedy those pesky drips. Pinpointing where the leak is coming from is key; take it slow and go through each spot methodically to figure out if it’s the pipe, drain, or faucet causing issues. It can be frustrating trying to puzzle it out, but stay positive! Address what you can or call a plumber if it’s beyond your skills; there’s no shame in asking for help.
Break it down step-by-step instead of getting overwhelmed by the whole messy leak. Stay cool under pressure. Keep at it and that stubborn leak doesn’t stand a chance against you! With some determination, soon you’ll be happily washing dishes in your kitchen again, with no puddles or drips in sight. And you’ll gain the confidence to tackle the next home fix-it project that comes your way. The leaky sink met its match!
Trust your plumber for stubborn leaks.
While many basic sink leak repairs are doable for a dedicated DIYer, don’t be afraid to call in a professional if your issue involves severe leakage or you simply feel overwhelmed. An experienced plumber has all the necessary tools and knowledge to fully diagnose your sink, pipes, and drain system. They can often fix pesky leaks and drips in no time flat and even show you maintenance tips to avoid problems in the future. Paying a plumber to prevent damage from a major leak is ultimately cost-effective too.