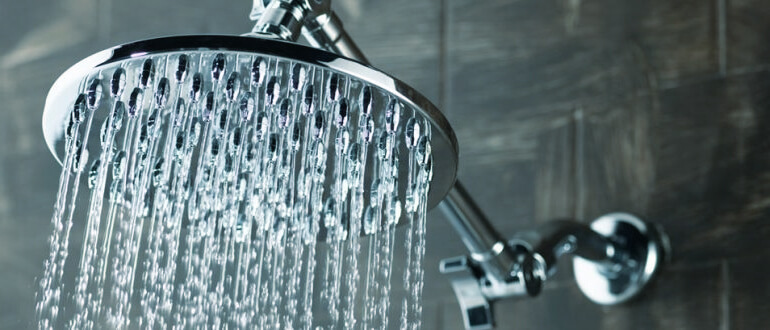
Are you looking at replacing a showerhead? Whether you’re considering swapping out your showerhead for something more practical or you’re after both style and substance, making that switch takes a little work upfront. When done correctly, replacing your shower head can be an easy task. From more powerful showerheads to replacements for broken parts, completely replacing an existing shower head is something that you can DIY if you’d prefer not to go down the professional route.
We’ve compiled a step-by-step guide to help you do everything right the first time if you’re planning on replacing your shower head yourself. Read on for the seven steps you’ll want to take when replacing your shower head:
Table of Contents
- Step 1: Choosing Your New Showerhead
- Step 2: Preparing Your Tools and Bathroom
- Step 3: Removing Your Existing Showerhead
- Step 4: Cleaning and Prepping the Shower Hose
- Step 5: Attaching Your New showerhead
- Step 6: Testing Your New Showerhead
- Step 7: Adjusting and Finishing Your Showerhead Replacement
Step 1: Choosing Your New Showerhead
The first step to successfully replacing your shower head is choosing what you want to change it to in the first place. If you have a specific idea of what kind of shower head you want, it should be a relatively easy task to source the exact style and shape you’re looking for. Showerheads are available from many major DIY chains or can be purchased online and delivered to your door.
Before you buy, it’s worth checking that the fitting of your new shower head is the same as your existing one. If there are differences, you may need to invest in a new shower system instead of swapping out the head itself. Doing your research is the best place to start, whether you want a natural rain shower, high pressure, or just something that suits your bathroom décor slightly better.
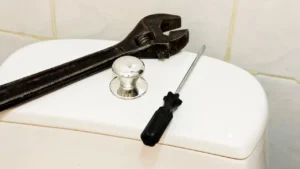
Step 2: Preparing Your Tools and Bathroom
To make the replacement process as easy as possible, you’ll want to do some preparation to keep your bathroom clean, tidy and mess-free. Start by laying down a towel or blanket in the bathtub or shower tray to prevent any small parts from falling down the drain, as well as catching any excess water within the showerhead or pipe itself from recent use. This will also protect the floor from scratches and dents from tools or dropped items.
Next, make sure your shower is 100% turned off to prevent drips or leaking. You don’t need to shut off your mains water supply for this DIY, but you do want to make sure your shower is turned off tightly before you begin. Finally, gather the tools for the job together in preparation. While some showerheads come off quickly, others may need a wrench or pair of pliers for proper removal, especially when it comes to older or rusted showerheads. You may also want a cloth or towel to help with gripping the showerhead itself. Make sure you have everything you need on hand, just in case.
Step 3: Removing Your Existing Showerhead
Once you’ve done all your prep work, the next step is removing the existing showerhead. In some cases, this could involve turning the showerhead counterclockwise for quick and effortless removal. But in other cases, you may need pliers to be able to complete the removal job. In the case of showerheads attached to the wall, you may need to use a cloth and wrench to get a proper grip for swift and easy removal.

In rare cases, the connection between the shower and the hose may be very rusted or degraded. In these cases, you may need to replace your hose in addition to your shower head. A specialist plumber or handyman would be able to help you if it turns out replacing your shower head is a bigger job than you thought it would be.
Step 4: Cleaning and Prepping the Shower Hose
Before you install your shiny new shower head, you’ll want to first remove any grime, mould or rust from your shower hose that has now been made visible. If there is just minor dirt, a quick clean with bathroom cleaner and a cloth will do everything needed. Of course, you’ll want to make sure the threads are completely clean before installation. Using a toothbrush or scrubbing brush to get in the nooks and crannies is always a good idea.
If you’ve noticed an issue with mould or rust inside the hose – usually accumulated because of a blocked or old shower head – you may want to do a complete treatment before you install your new showerhead. This may mean soaking your house overnight in mould and mildew treatments or rust remover, leaving it fresh and ready for use the following day.
Step 5: Attaching Your New showerhead
With all the hard work out of the way, all you need to do now is install your brand-new shower head ready for use. In many cases, modern shower heads are straightforward to screw onto a hose by turning clockwise. Next, you should tighten your showerhead as much as possible using your hands and a cloth for grip. Once you can’t do any more by hand, you can then use pliers and the wrench to ensure a very tight fit for longevity.

If you want an even more watertight fit, you can also purchase Teflon tape for use inside the shower and hose connection. This tape ensures there are no leaks when installed correctly and can provide peace of mind. If you want your shower head to perform at its best, Teflon tape may be a worthwhile investment.
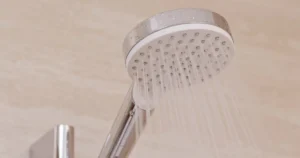
Step 6: Testing Your New Showerhead
With your new shower head installed, you’ll want to carry out a few tests to ensure everything is working as it should. First, turn your shower on to a low power setting and check for any leakage around the shower head that isn’t coming from the nozzles. You can also check for blocked nozzles or any damage at this point to ensure your shower head is working as it should.
Once you’ve checked on low power, you can crank up the power to see how your shower head handles higher pressure. If everything looks good, then you’ve installed your shower head directly. All that’s left to do is adjust it exactly how you like it.
Step 7: Adjusting and Finishing Your Showerhead Replacement
You’re done with the technical bit – so now it’s all about personal preference. Many showerheads come with different spray options, so you can test which one you like best. Now’s the time to check you like the positioning of your shower head, too, so you can provide the perfect showering experience from day one.
If you want to replace your shower head, but you don’t want the up-front work of a DIY project, hiring a professional is ideal to ensure a job well done. Our local professionals at Same Day Trades are the perfect choice for expert shower head replacement. Whether the job is more complex than you thought or you’re considering replacing your whole shower system, our specialists are on hand to complete the work to the highest standards.
Enter your postcode on our site today to find local plumbers and other trade professionals near you. With many of our trusted tradesmen offering 24-hour service and with entirely transparent pricing, we’re the ideal choice for your shower head replacement in Australia.